
Hi, I'm Thomas and I'm gonna show you how to build and release a React Native app to iOS and Android stores on macOS.
Our goals
What we aim to accomplish:
- Automated build process that generates signed and ready-for-stores release builds.
- Handling different environments (development, staging, production) with different domain-related variables (e.g. URL of the back-end API).
So let's get to it.
Prerequisite
iOS
You'll need a Apple ID and Xcode is installed on you mac.
Also ensure that you agreed to Apple's latest terms and conditions (just launch Xcode and click Agree).
Android
🔧 Get Android Studio with tools required by React Native
🔧 Launch Android Studio and install Android SDK and other required libraries React Native requires Android 6.0 and SDK 23.0.1
🔧 Configure your Android Home environment variable by adding the following lines in your bash profile file:
export ANDROID_HOME=${HOME}/Library/Android/sdk
export PATH=${PATH}:${ANDROID_HOME}/tools:${ANDROID_HOME}/platform-tools
Create your app
We won't be using the default react-native way that relies on Expo (a container to run your React-Native code in).
While Expo might be fine for experimenting and quickly bootstraping an App, it's not compatible with setting up a real release process as stated in our goals.
So instead, let's go to the Building Projects with Native Code section of the documentation:
🔧 Install the React Native cli tool:
npm install -g react-native-cli🔧 Create your app and be careful to choose a name that contains no dots, spaces or other special characters.
react-native init AcmeApp
cd AcmeApp
Environments and variables
To build a release of the app, we need to give it a few pieces of information:
- A unique identifier:
com.acme.app - A version number:
1.0.0 - A build number:
1 - Any domain-releted variables we need.
Unique identifier
Note the format of the unique identifier: a reverse domain name, starting with com, then the vendor name and then the app name.
I strongly recommend that you follow this format and avoid any special character.
This identifier must not be already used on Google Play Store or Apple's App Store.
Once published, an app can't change its identifier, so choose a name that can live through the whole life of the app. Don't worry though, it's only a technical identifier, it will not be displayed to the public anywhere and you'll have a Display name for that and this one can change anytime you need.
Version Number
The version number must follow the semver format major.minor.patch.
Build Number
The build number is just an integer as simple as 1.
You'll increment build number every time you publish a release. You can't upload a release that has a build number inferior or equal to any build you ever uploaded for this app.
Domain related variables
We might also need some domain-releated variables like the address of the API providing the data for the app.
Such variables will likely have different values in different environments.
For example, we want to call http://api.app.acme.test in development mode in the simulator, and https://api.app.acme.com in a production release for the stores.
Enable vendor name in Android
Before anything else, we need to configure Android to support the unique identifier we chose for the app.
The init script generated a unique identifier for Android based on the name you gave it (e.g. com.acmeapp for AcmeApp).
💡 You can see what name was generated by looking for the applicationId key in android/app/build.gradle.
If you need to change that unique identifier, do it now as described below:
🔧 In the /android folder, replace all occurrences of com.acmeapp by com.acme.app
🔧 Then change the directory structure with the following commands:
mkdir android/app/src/main/java/com/acme
mv android/app/src/main/java/com/acmeapp android/app/src/main/java/com/acme/app
💡 You need a folder level for each dot in the app identifier.
React Native Config
For setting and accessing the variables described above wherever we need it, I recommend using react-native-config
🔧 Install it with:
yarn add react-native-config
react-native link react-native-config
🔧 Then create an Env file for each environment in the root folder of the project, with the following suggested variables:
.env.development
APP_ID=com.acme.app
APP_ENV=development
APP_VERSION=0.1.0
APP_BUILD=1
API_HOST=http://api.app.acme.local
.env.staging
APP_ID=com.acme.app
APP_ENV=staging
APP_VERSION=0.1.0
APP_BUILD=1
API_HOST=http://api.app.acme.staging
.env.production
APP_ID=com.acme.app
APP_ENV=production
APP_VERSION=0.1.0
APP_BUILD=1
API_HOST=http://api.app.acme.com
Configure the release
Generate an Android Signing Key
Android requires that you sign APK before releasing them on the Play Store. To do so you will need to generate a personal signing key and to configure your Gradle build to use that key.
Edit your local gradle config file ~/.gradle/gradle.properties:
🔧 Fill it with the following lines:
MY_RELEASE_STORE_FILE=my_release.keystore
MY_RELEASE_KEY_ALIAS=my_release
MY_RELEASE_STORE_PASSWORD={Generate a 32 characters password}
MY_RELEASE_KEY_PASSWORD={Generate another 32 characters password}
💡 You'll need to generate 2 passwords
🔧 Now generate the keystore key file:
keytool -genkey -v -keystore ~/.gradle/my_release.keystore -alias my_release -keyalg RSA -keysize 2048 -validity 10000🔧 Follow the instructions as below:
Entrez le mot de passe du fichier de clés: {MY_RELEASE_STORE_PASSWORD}
Ressaisissez le nouveau mot de passe: {MY_RELEASE_STORE_PASSWORD}
Quels sont vos nom et prénom ? Jane Doe
Quel est le nom de votre unité organisationnelle ? Lyon
Quel est le nom de votre entreprise ? élao
Quel est le nom de votre ville de résidence ? Lyon
Quel est le nom de votre état ou province ? Rhones-Alpes
Quel est le code pays à deux lettres pour cette unité ? FR
Est-ce CN=Jane Doe, OU=Lyon, O=élao, L=Lyon, ST=Rhones-Alpes, C=FR ? oui
Entrez le mot de passe de la clé pour <my_release> {MY_RELEASE_KEY_PASSWORD}
Ressaisissez le nouveau mot de passe : {MY_RELEASE_KEY_PASSWORD}
🔧 Finally, link the keystore to the project with a symbolic link:
ln -s ~/.gradle/my_release.keystore android/app/my_release.keystoreConfigure the gradle build
Edit the android/app/build.gradle file and apply the following changes:
🔧 Insert the following line on line 2:
apply from: project(':react-native-config').projectDir.getPath() + "/dotenv.gradle"🔧 In the config block, replace the following lines:
defaultConfig {
-    versionCode 1
+    versionCode project.env.get("APP_BUILD") as Integer
-    versionName "1.0"
+    versionName project.env.get("APP_VERSION")
  // ...
}
🔧 Between the splits and buildTypes blocks (should be line 118) add the following block :
signingConfigs {
    release {
        storeFile file(MY_RELEASE_STORE_FILE)
        storePassword MY_RELEASE_STORE_PASSWORD
        keyAlias MY_RELEASE_KEY_ALIAS
        keyPassword MY_RELEASE_KEY_PASSWORD
    }
}
🔧 Then add the signingConfig property in the buildTypes > release section (should be line 131)
buildTypes {
    release {
        // ...
        signingConfig signingConfigs.release
    }
}
Configure the iOS build
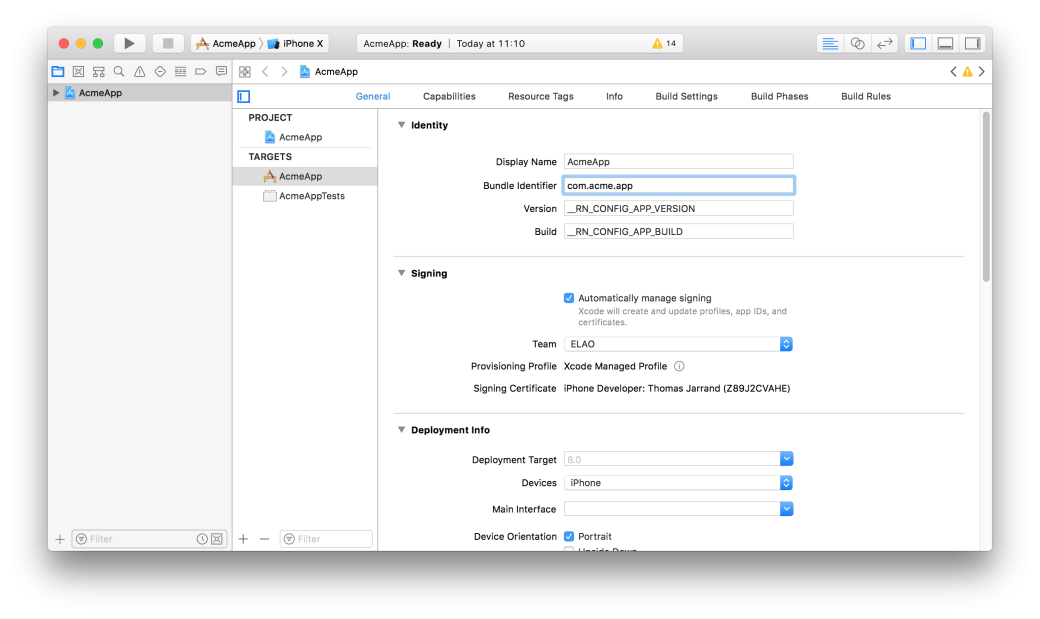
Open your iOS project iOS/AcmeApp.xcodeproj with Xcode and select the root item AcmeApp in the file browser on the left.
General tabIn the
🔧 In the Identity section input the following values:
- Bundle Identifier: Your app unique identifier
com.acme.app(instead of org.reactjs.native.example.AcmeApp) - Version:
__RN_CONFIG_APP_VERSION - Build:
__RN_CONFIG_APP_BUILD
🔧 In the Signing section, select a Team
Build Settings tabIn the
🔧 In the All section:
- Search for "preprocess"
- Set Preprocess Info.plist File to
Yes - Set Info.plist Preprocessor Prefix File to
${BUILD_DIR}/GeneratedInfoPlistDotEnv.h - Set Info.plist Other Preprocessor Flags to
-traditional
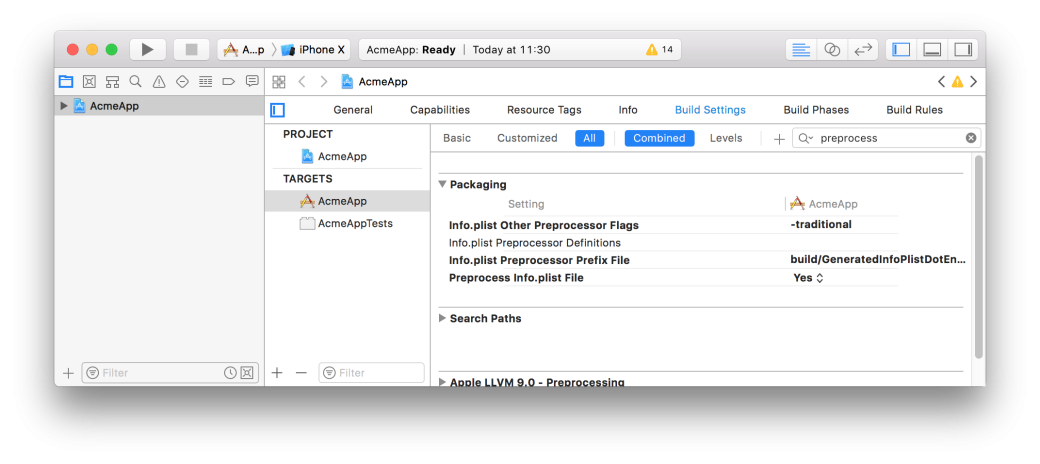
💡 If you don't see those settings, verify that "All" is selected at the top (instead of "Basic").
Change the public app name
To change the name that will be displayed to the public on the stores:
On iOS
🔧 Open your project with XCode and set a Display Name in the General > Identify section.
On Android
🔧 Set the displayName property in the the app.json file at the root of the project.
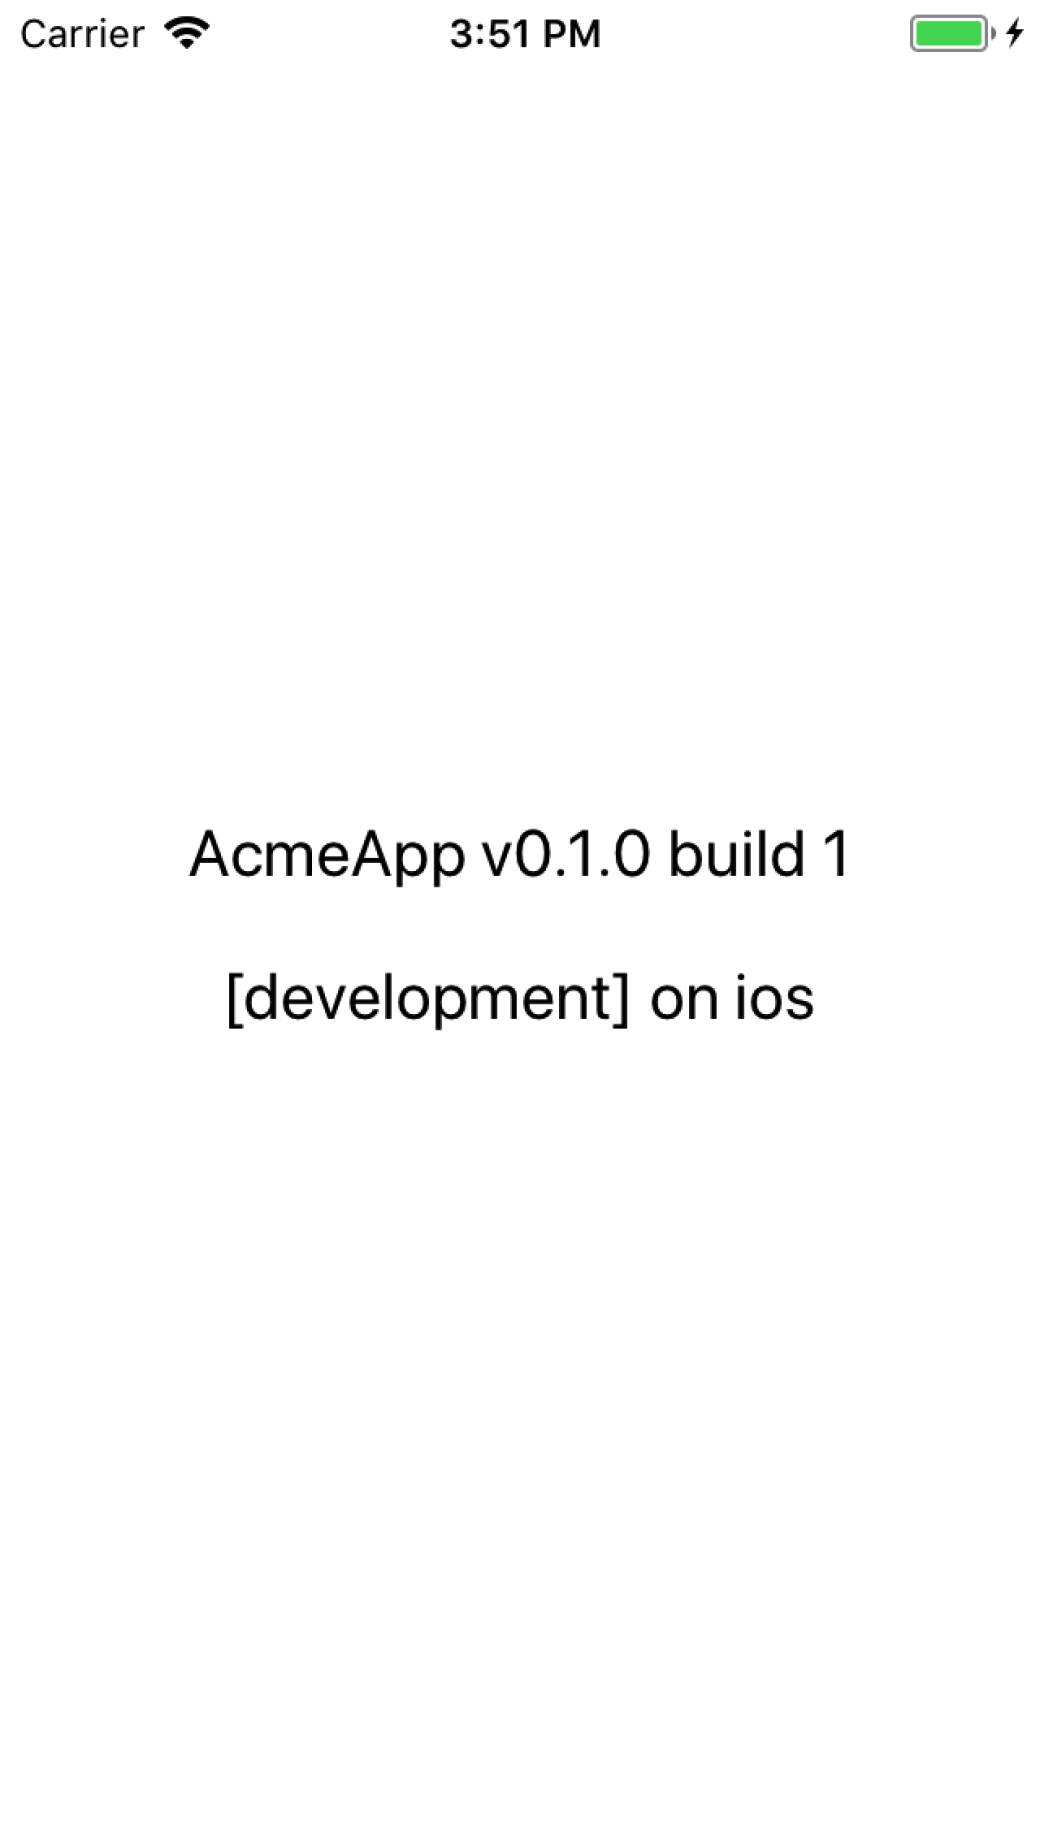
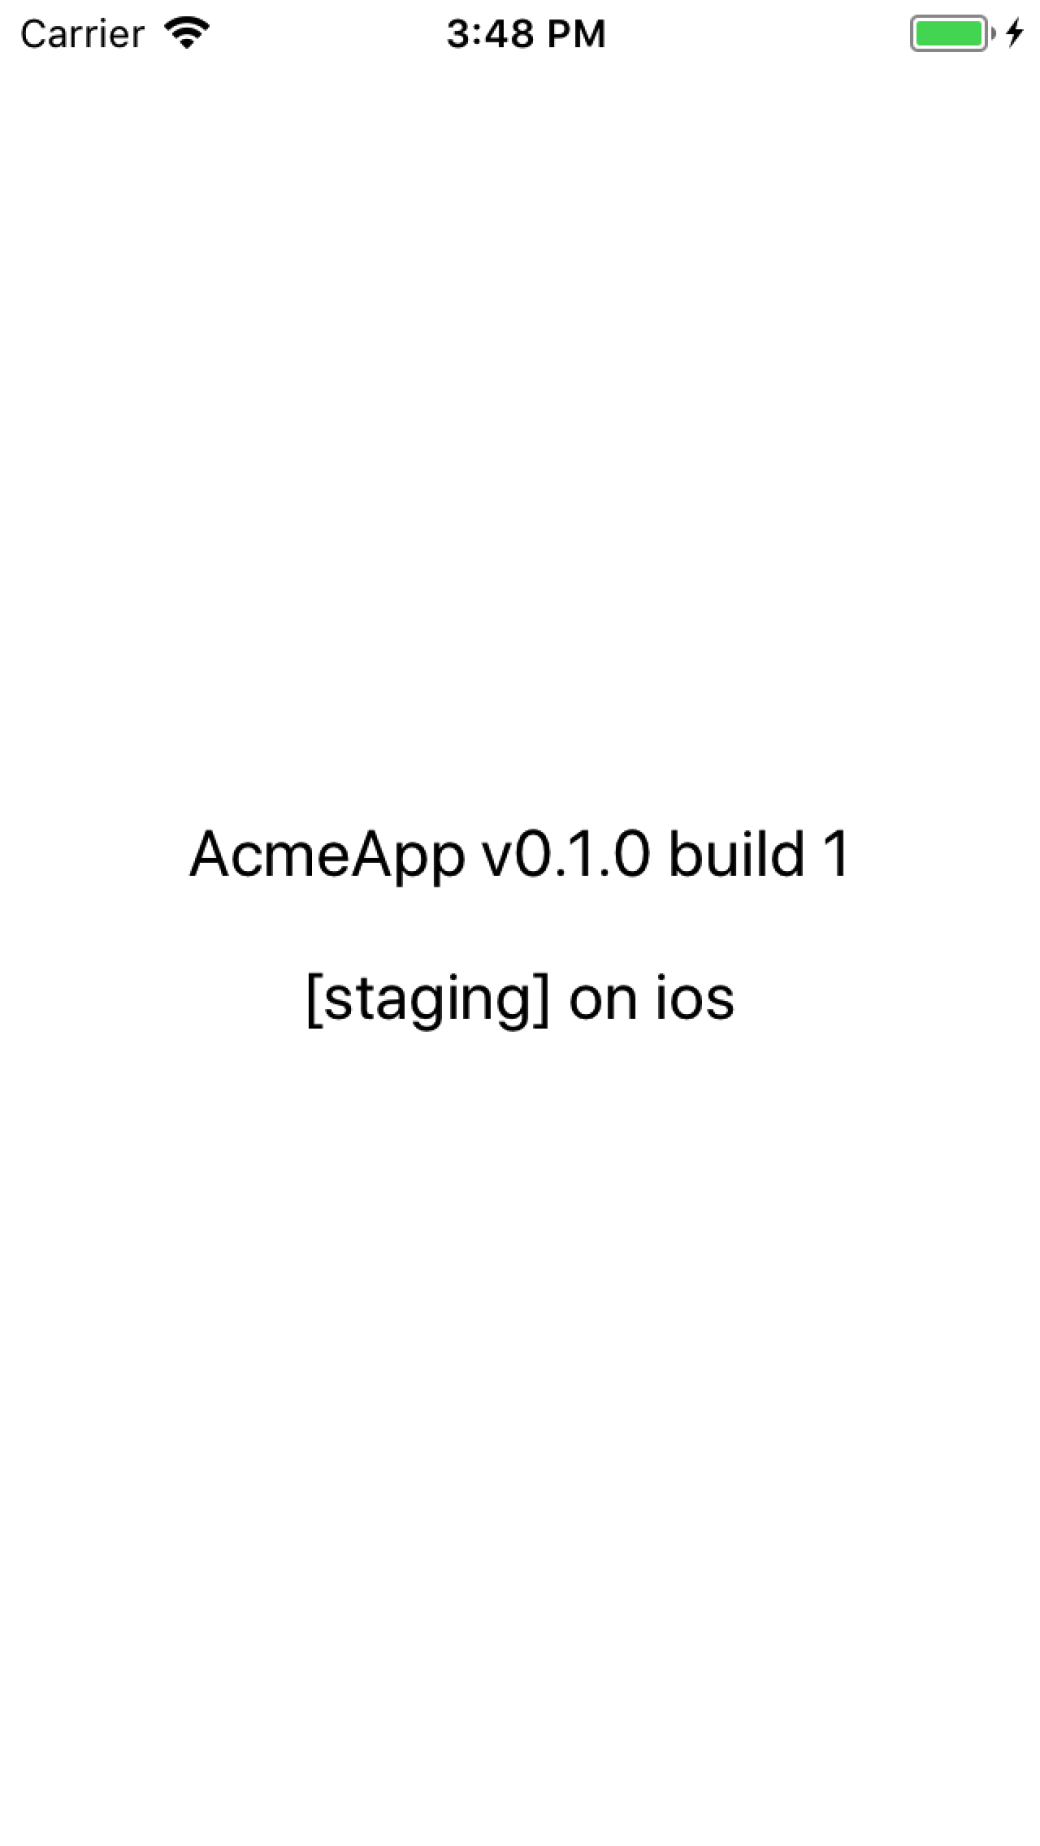
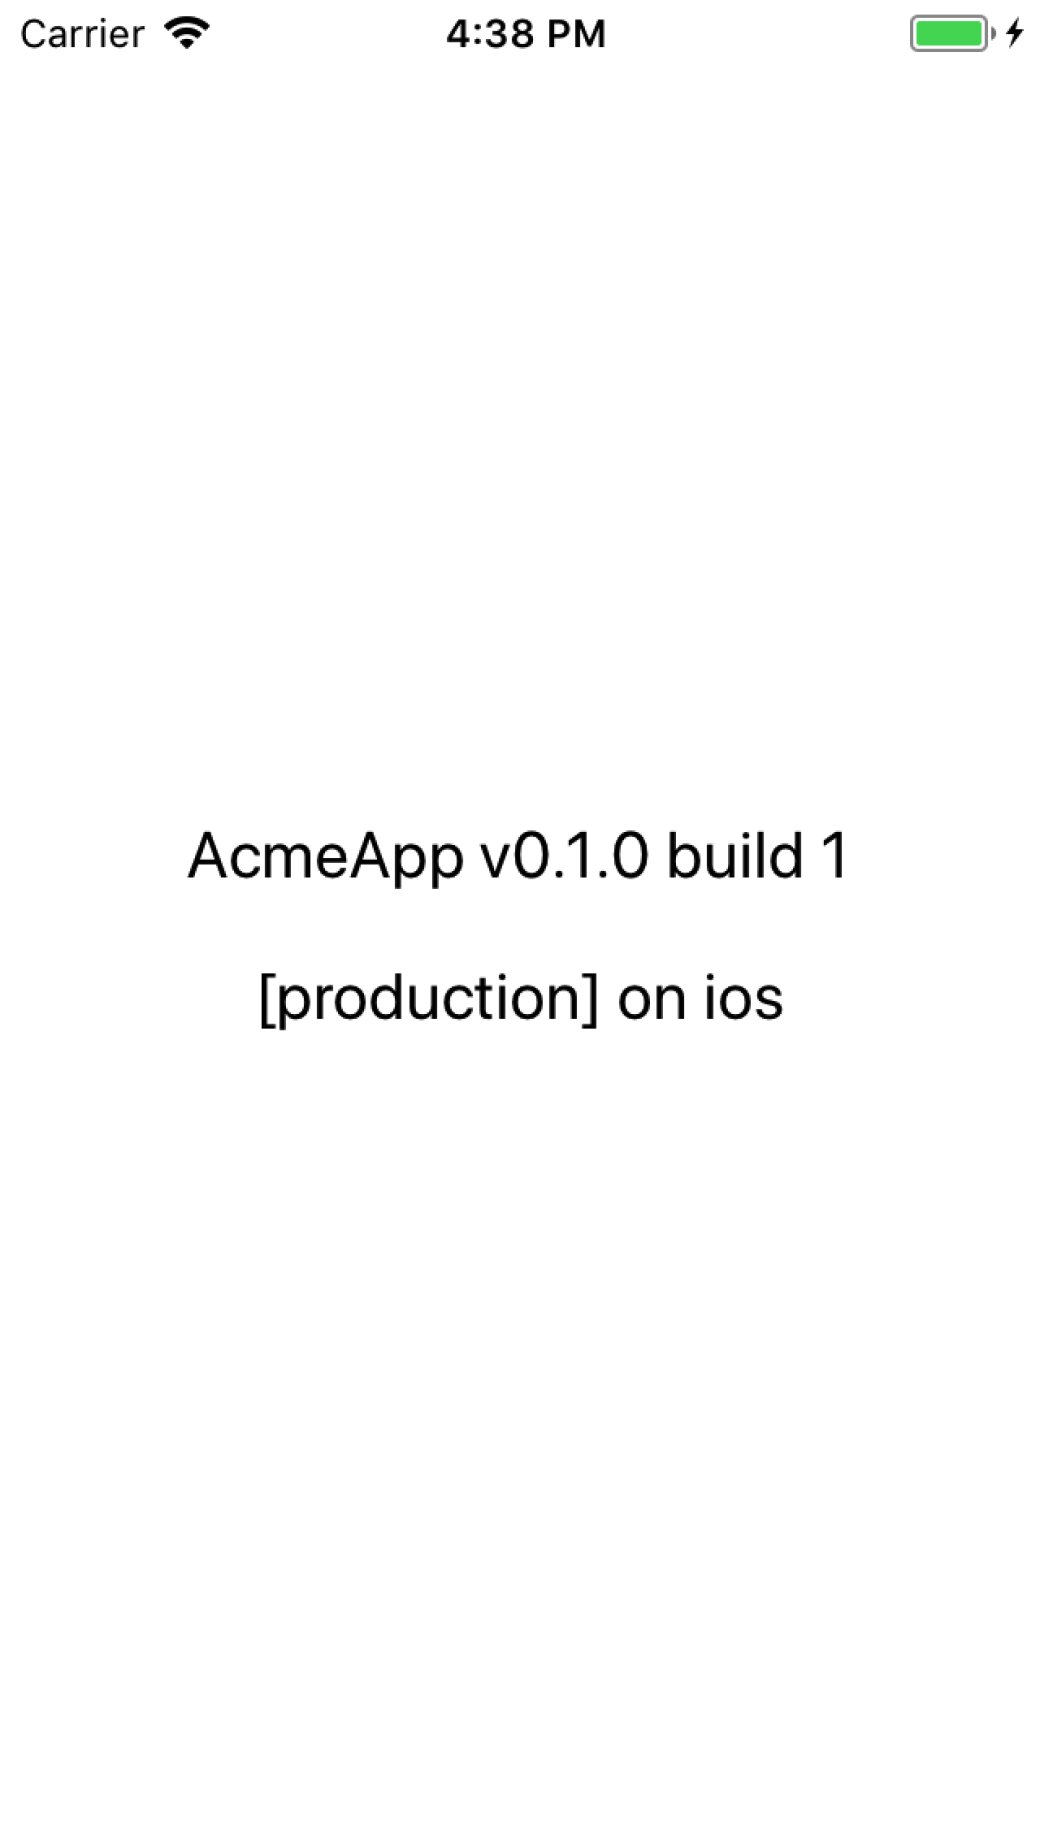
Test our setup
Here's a simple homepage that displays the app version, build number, environment and platform.
You can open your ./App.js file and replace its content with the following code:
import React, { Component } from 'react';
import { Platform, Text, View, StyleSheet } from 'react-native';
import Config from 'react-native-config';

export default class App extends Component {
  static styles = StyleSheet.create({
    container: {
      flex: 1,
      justifyContent: 'center',
      alignItems: 'center',
      backgroundColor: '#ffffff',
    },
    infos: {
      textAlign: 'center',
      color: '#333333',
    },
  });

  render() {
    const { styles } = App;
    const { APP_ENV, APP_VERSION, APP_BUILD } = Config;
    const { OS } = Platform;

    return (
      <View style={styles.container}>
        <Text style={styles.infos}>
          AcmeApp v{APP_VERSION} build {APP_BUILD}
        </Text>
        <Text style={styles.infos}>
          [{APP_ENV}] on {OS}
        </Text>
      </View>
    );
  }
}
Quick launch commands
Start the react-native packager manually : react-native start
Now a simple react-native run-ios should start your app in iOS simulator.
react-native run-ios --simulator 'iPhone SE'Run the app in the simulator on a specific device.react-native run-ios --deviceRun the app on a real iPhone (that must be connected to the mac by USB).react-native run-ios --device --configuration ReleaseRun the app on a real iPhone as a release (fast and no debug, just like it will be in the store).react-native run-androidRun the app on any simulated or real android device found.react-native run-android --variant=releaseRun the app on any simulated or real android device found, as a release.
What's more, we can now run the app in a certain environment by specifying the ENVFILE that React Native must use:
| Develoment | Staging | Production |
|---|---|---|
ENVFILE=.env.development react-native run-ios |
ENVFILE=.env.staging react-native run-ios |
ENVFILE=.env.production react-native run-ios |
 |
 |
 |
Store configuration
Generate store icons
Apple's App Store and the Google Play Store both require that you provide icons for your app in various formats.
Fortunately, there are a few online-services that will generate those icons for you from a high-res source icon.
I personally use https://makeappicon.com
- Upload a high-res square icon (ideally
1536x1536). - Enter an email (you don't have to subscribe to the newsletter).
- You will receive the icons by email.
Setup icons for iOS
🔧 Move the content of iOS in the following path in your project folder: iOS/AcmeApp/Images.xcassets/ (if asked, replace existing content with the new icons).
Setup icons for Android
🔧 Move the content of android in the following path in your projet folder: android/app/src/main/res (if asked, replace existing content with the new icons).
Setting up a launch screen
Generation
For splash screen, I use: http://apetools.webprofusion.com/tools/imagegorilla
- Upload a high-res square splash screen (ideally
2048x2048). - Press
Kapow. - Download the zip file.
🔧 Then place the generated launch screen in the same folder as the store icons described above.
Configuration
iOS
Open your project in XCode:
- In the General tab, go to the App Icons and Launch Images section.
- On the Launch Images Source line, click the User Asset Catalog button, then click migrate.
- Once done, click the little grey arrow at the end of the App Icons Source line.
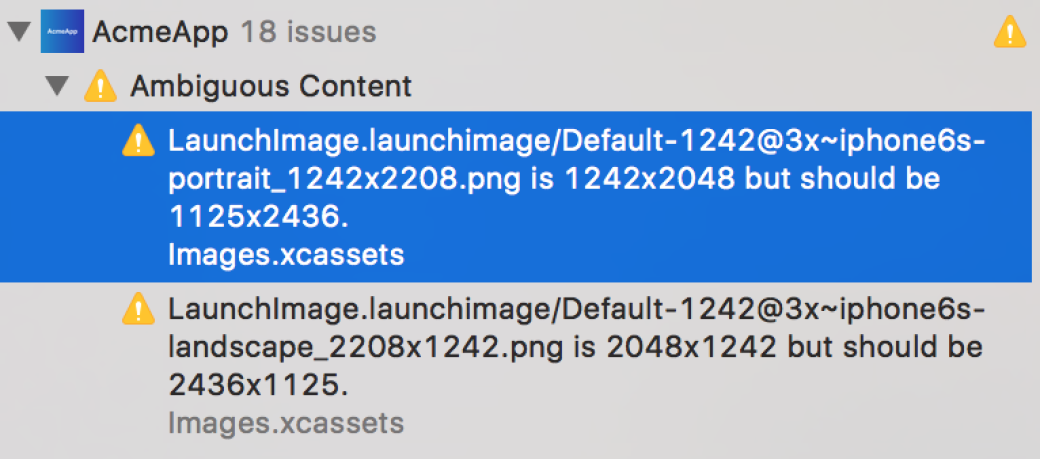
🔧 Click on the newly created LaunchImage catalog, and fill every required launch screen with the corresponding format from the generated image folder.
💡 If you're having trouble figuring out which format corresponds to which case, the alert tab on the left will tell you exactly what size is expected for each image.
🔧 Finally, go back in the General tab, in the App Icons and Launch Images section, do the following:
- As Launch Images Source select LaunchImage.
- Empty the Launch Screen File.

💡 You can now delete the LaunchScreen.xib in the AcmeApp folder.
Android
🔧 Create a android/app/src/main/res/drawable/splash_screen.xml file:
<?xml version="1.0" encoding="utf-8"?>
<layer-list xmlns:android="http://schemas.android.com/apk/res/android">
    <item>
        <bitmap android:gravity="center" android:src="@drawable/screen"/>
    </item>
</layer-list>
🔧 Create a android/app/src/main/res/values/colors.xml file:
<resources>
    <color name="primary">#ffffff</color>
</resources>
💡 Here #ffffff is there to set a white background to the app, feel free to replace it with the color of your choice.
🔧 Then edit android/app/src/main/res/values/styles.xml to add the following node in the style tag:
<style name="AppTheme" parent="Theme.AppCompat.Light.NoActionBar">
    <!-- Customize your theme here. -->
+    <item name="android:windowBackground">@drawable/splash_screen</item>
</style>
Build store release
iOS release
The following command will generate your iOS release:
ENVFILE=.env.production xcodebuild \
    -workspace ./iOS/AcmeApp.xcodeproj/project.xcworkspace \
    -scheme AcmeApp \
    -sdk iphoneos \
    -configuration AppStoreDistribution archive \
    -archivePath ./iOS/release/AcmeApp.xcarchive
The archive will be available at ./iOS/release/AcmeApp.xcarchive and you can open it in Xcode to build an IPA for development purpose or upload it to the App Store.
Android release
The following command will generate your Android release:
. ./.env.production && cd android && ./gradlew assembleReleaseThe APK will be available at ./android/app/build/outputs/apk/app-release.apk and you can upload it directly to the Play Store.
Troubles?
Here's a working example of all we discussed above : https://github.com/Elao/AcmeApp
💡 Note the handy Makefile that hides all complex build and release commands behind simple make tasks like: make run android or make release-ios
Also don't hesitate to reach out for help in the comment or on social medias.